FITBOX GATE 各アプリの使い方
- Zwift
- Kinomap
1.初期設定
・アカウント登録
「Zwift」をインストールします。

画面を右にスライドします。

「GOT IT!」を押下します。

「新規登録」を押下します。

名・姓を入力し「次へ」を押下します。

Eメール・設定したいパスワードを入力し「レッツゴー」を押下します。

Zwiftの利用規約です。よくお読みになり「却下」若しくは「承諾」を押下します。

「承諾」を押下すると、情報入力画面に移ります。該当するものを押下します。

こちらも該当するものを押下し、「OK」を押下します。以上でアカウント登録は完了です。

・FITBOX GATE連携
ZwiftとFITBOX GATEの連携はBluetoothを採用しております。「OK」を押下します。

FITBOX GATEをご使用するバイクのクランクに取付けた後、「スピードセンサー」を押下します。

タイヤサイズを設定します。▼をタップし選択します。


FITBOX GATEが連携できていると、画面内にデバイスが検出されます。
検出されない場合、一度「OK」を押下し再度「スピードセンサー」を押下してください。

次にご使用するスマートトレーナーの選択画面に移行します。

FITBOX、FITBOX LITEをご使用の場合、
下までスクロールしOtherの「Not Listed」をタップし「OK」を押下します。

「スピードセンサー」の連携が完了すると次の画面のように表示が切替ります。
「ケイデンスセンサー」を押下し同様に連携します。※自動で接続されている場合がございます。

2.トレーニングを始める
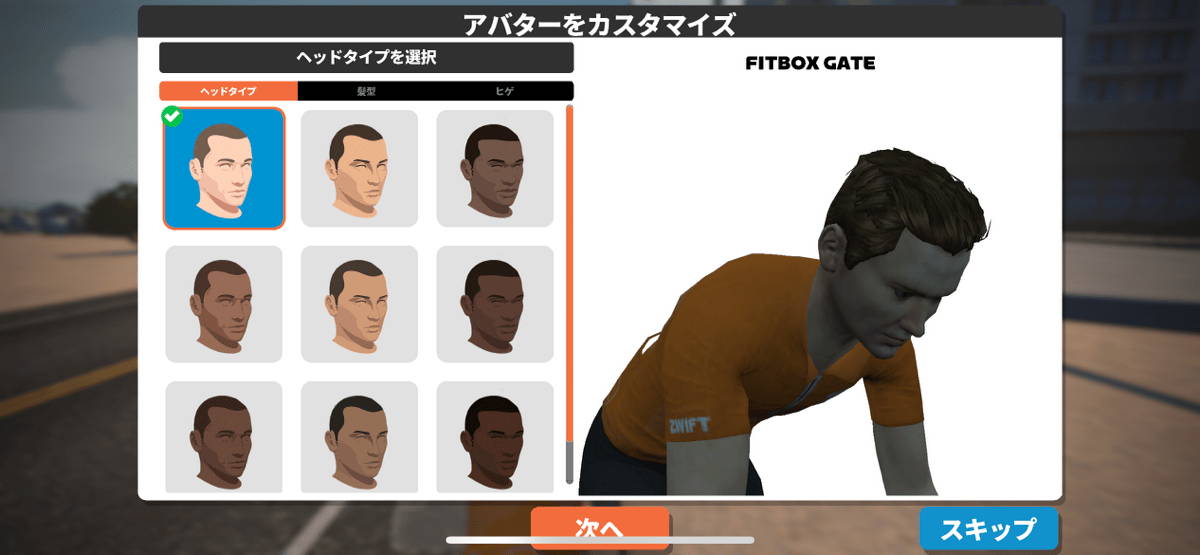
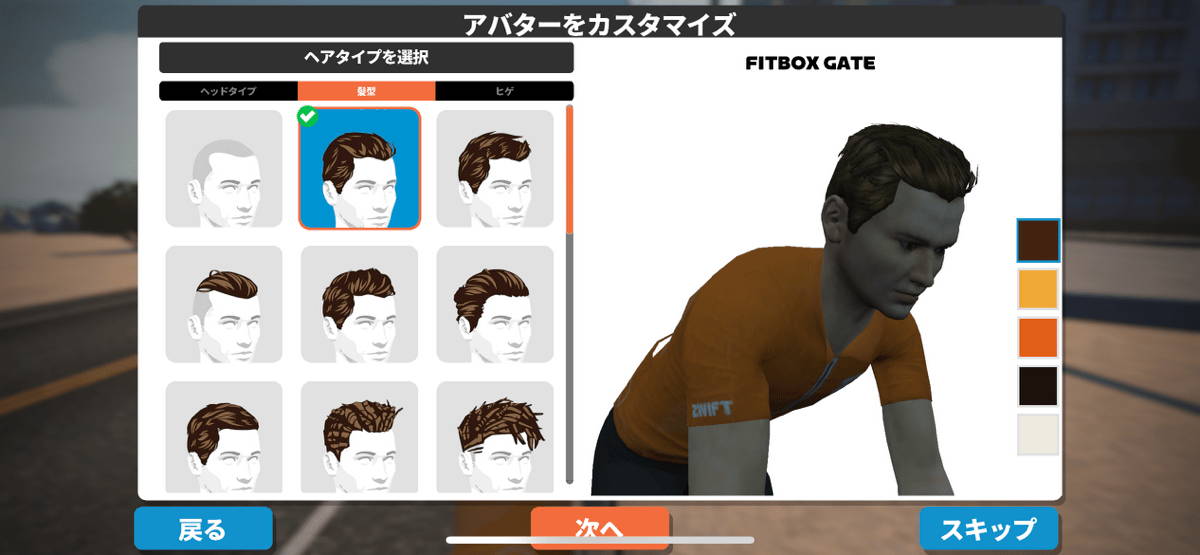
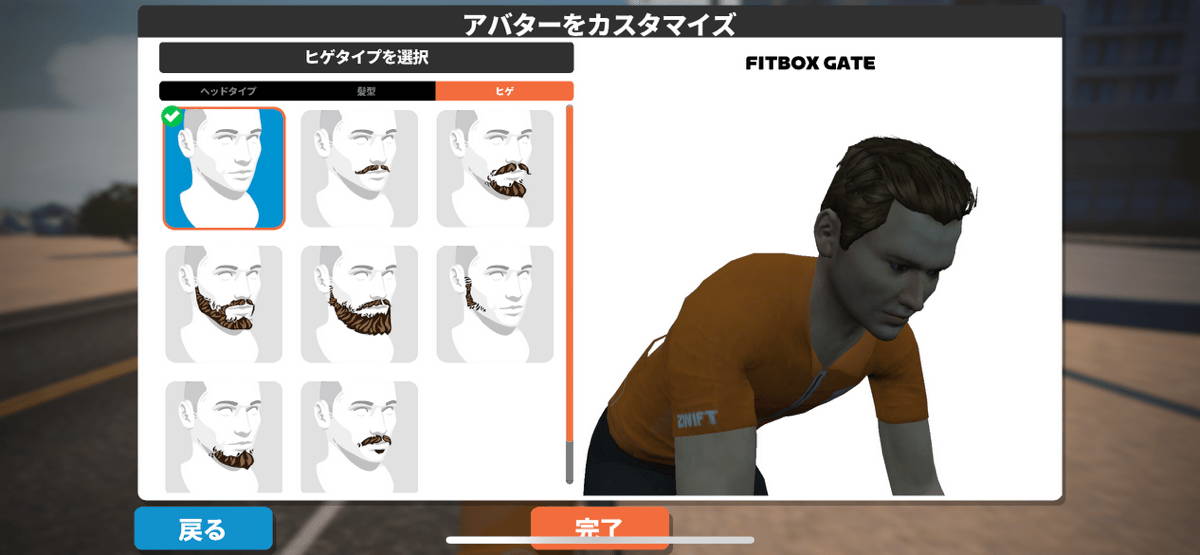
・アバターの設定
全画面で「レッツゴー」を押下するとアバターの設定画面に移行します。
性別を選択します。

体型を設定し「保存」押下します。

アバターをカスタマイズします。
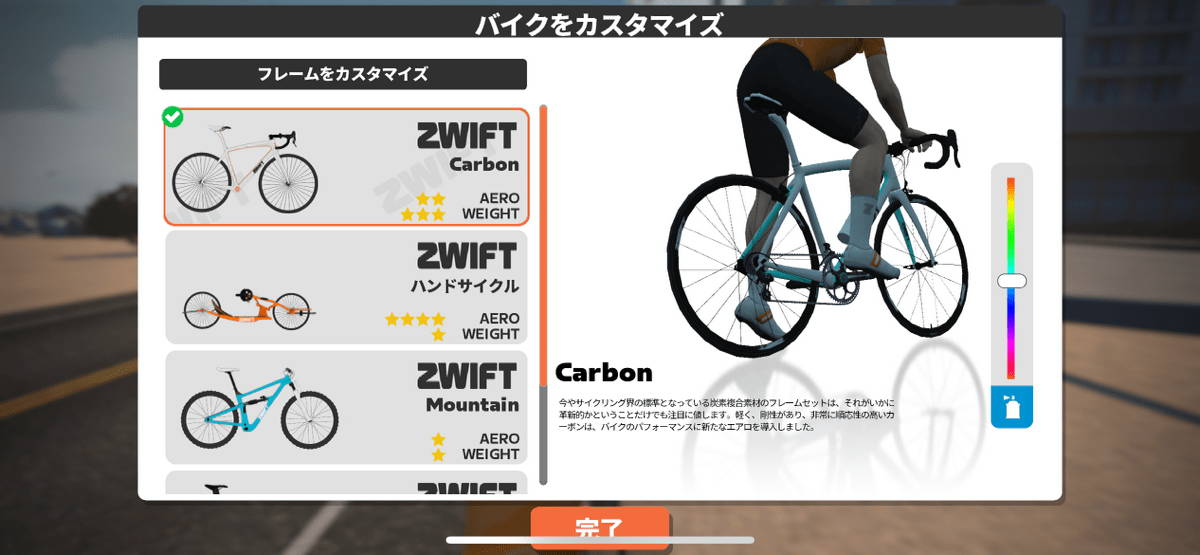
バイクをカスタマイズします。「完了」を押下すると走行が開始します。
・画面の説明
各パラメータの説明は以下の通りです。


走行中は以下のように数値が変化しますので、トレーニング目的に応じ調整してください。

メニューを押すと、以下の画面に移行し今回のライドの情報を確認したり、ライドを終了したりできます。

1.初期設定
・アカウント登録
「Kinomap」をインストールします。

KinomapとFITBOX GATEの連携はBluetoothを採用しております。「OK」を押下します。

画面を右にスライドします。

「開始」を押下します。

Kinomapの利用規約です。
よくお読みになり「I REFUSE AND LEAVE THE APPLICATION」もしくは「I ACCEPT THE TERMS OF USE」を押下します。

新規登録の場合、右上の「ログイン」を押下します。

登録情報を入力し「マイアカウントを作成する」を押下します。

アカウント登録が完了しました。続いて「プロファイルを作成する」を押下し、環境設定に移ります。

・FITBOX GATE連携
必要事項を入力し「マイマシーン(器具)を追加する」を押下します。

FITBOXをお使いの場合、マシーンのタイプは右側を選択します。

画面を一番下までスクロールします。

「SENSORS」を押下します。

「8 levels exercise bike」を選択します。

FITBOX GATEを付けているペダルを回転させ、センサーを検出させます。

検出されたセンサを押下します。

設定は以上で完了です。「開始」を押下します。

タイヤサイズを変更する場合は歯車マークをタップします。
「円周のリスト」をタップし、任意のタイヤサイズをタップすると変更完了です。

2.トレーニングを始める
・画面説明
「トレーニング」もしくは「ブラウズする」を押下します。

目的に応じたメニューを選択します。今回は「フリーライド」を押下します。

ペダルを漕ぐとFITBOX GATEのデータが出力されます。

各パラメータの説明は以下の通りです。

右上の停止をタップすると、トレーニングを終了することができます。
